How to Do KYC on Zerodha?
If you want to buy and sell stocks in India, the first step is to open a Demat account. And if you're using Zerodha, one of the most popular stock platforms in India, then you must complete KYC first. Don't worry, KYC is not a big deal. It’s just a way to prove your identity. Think of it like showing your Aadhaar before boarding a train; Zerodha just wants to make sure you are a real person. So here we will discuss how to do KYC on Zerodha.
What is KYC and Why Do You Need It on Zerodha?
KYC is short for Know Your Customer. It's a rule made by SEBI (the stock market regulator in India) to avoid fake accounts and scams. Zerodha checks:
- Who are you (your name, age)
- Where do you live (address)
- Your bank account
- Your signature and face
If you don’t complete KYC, you can’t trade, invest, or open a Zerodha account. Simple as that.
Prerequisites for Completing KYC on Zerodha
So, before you start your KYC process, first make sure you have the following documents and information handy:
- Aadhaar Card linked with a mobile number
- PAN Card
- Passport-Sized Photograph (recent photo)
- Bank Account details (cancelled cheque or bank statement)
- Digital Signature (Here you can create it during the process)
Step-by-Step Process to do KYC on Zerodha
For the KYC process, you need to create your account on Zerodha and then start with the KYC process to access all services. You can do trading and investment, so let's have a look at the process given below:
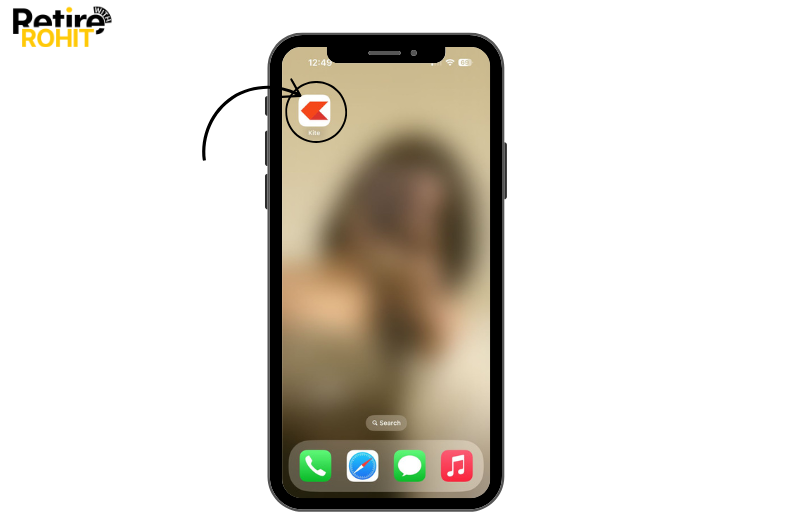
1. Open the Zerodha Kite.
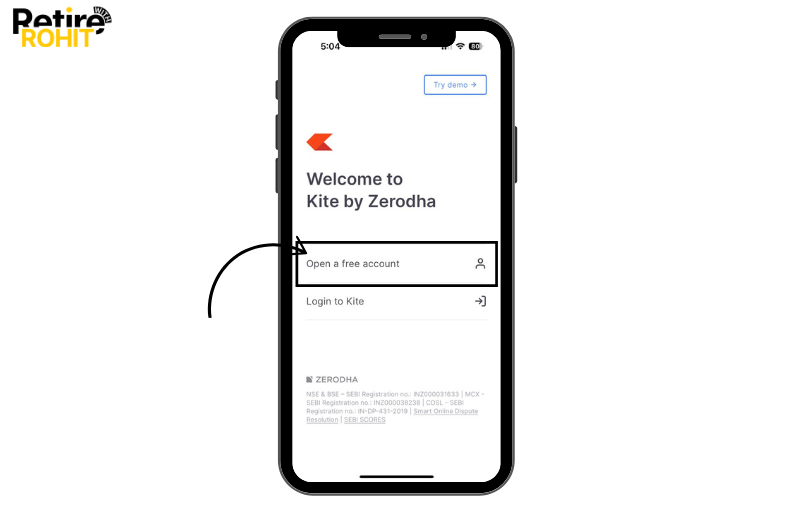
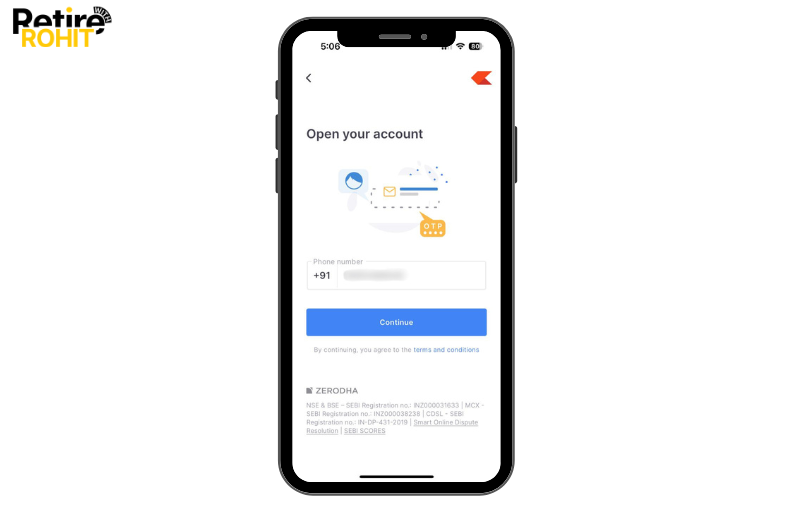
2. Click on the “Open a free account” option.
3. Enter 10 digits of your phone number, and click on the Continue button.
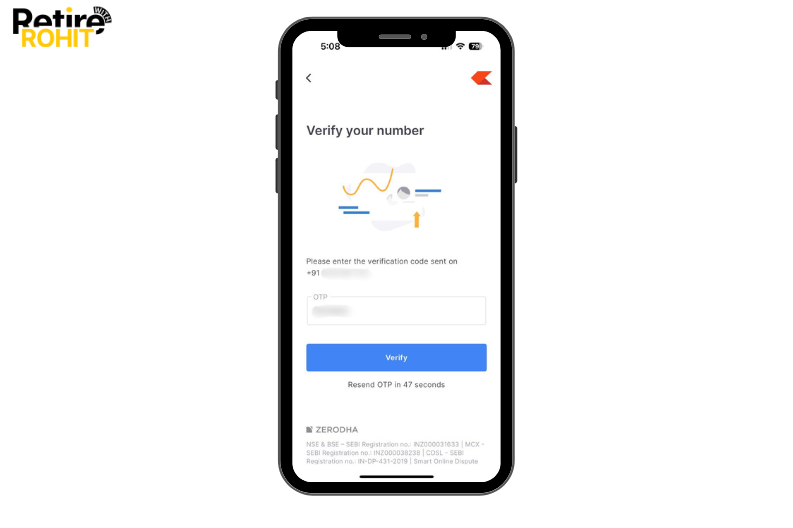
4. Enter the OTP that will be received on your registered mobile phone, and click on the Verify button.
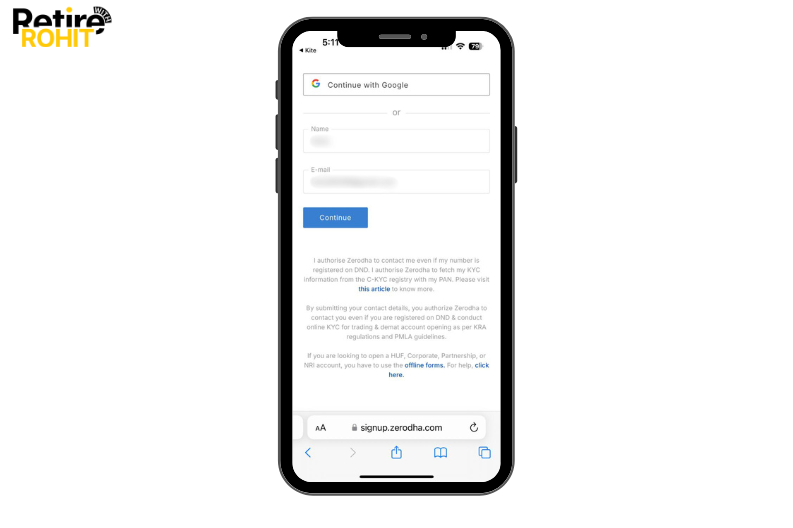
5. Automatically, a new tab will open on your preferred browser. Then enter your Name and Email address, or you can easily continue with it on Google.
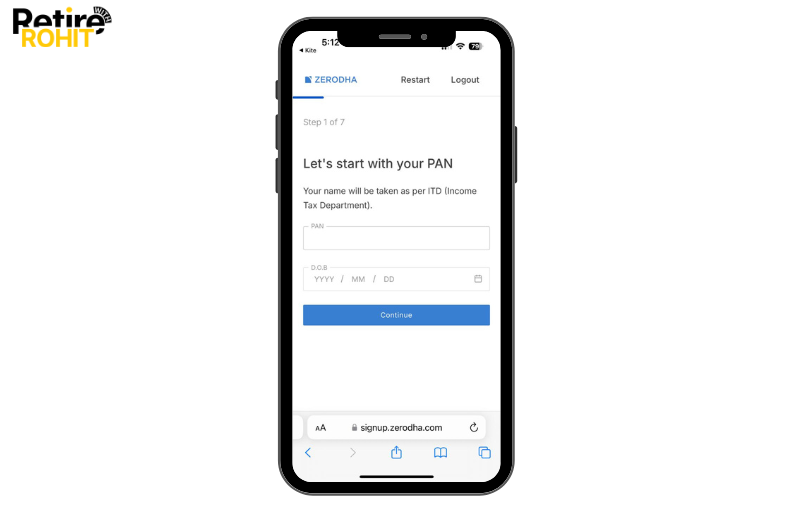
6. Enter your PAN details and D.O.B. and click on the Continue button.
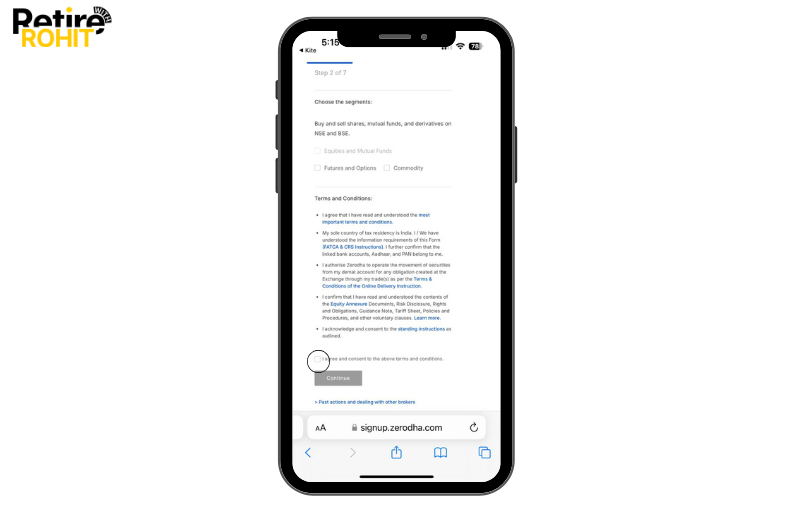
7. Now choose the segments and then read all the terms and conditions, and then tick the box, and click on the Continue button.
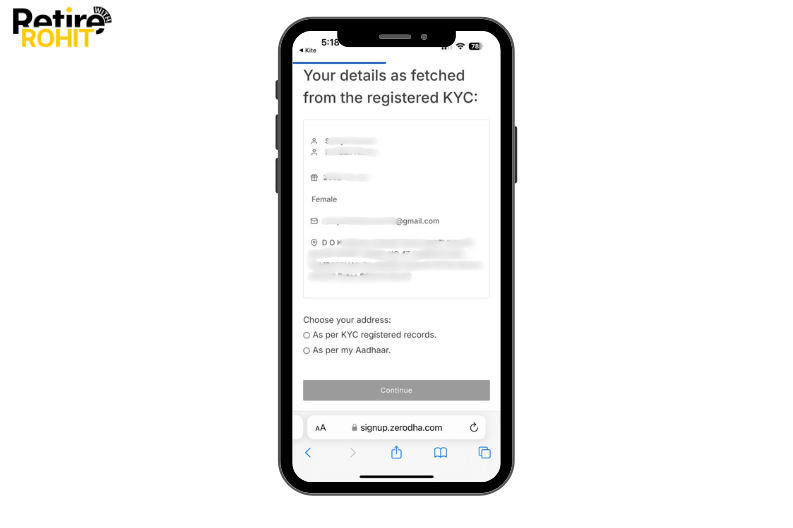
8. Now your details will be displayed on your device screen, and then you have to choose your address proof, as per KYC registration records or as per my Aadhaar. Here we are choosing as per my Aadhar. Click on the Continue button.
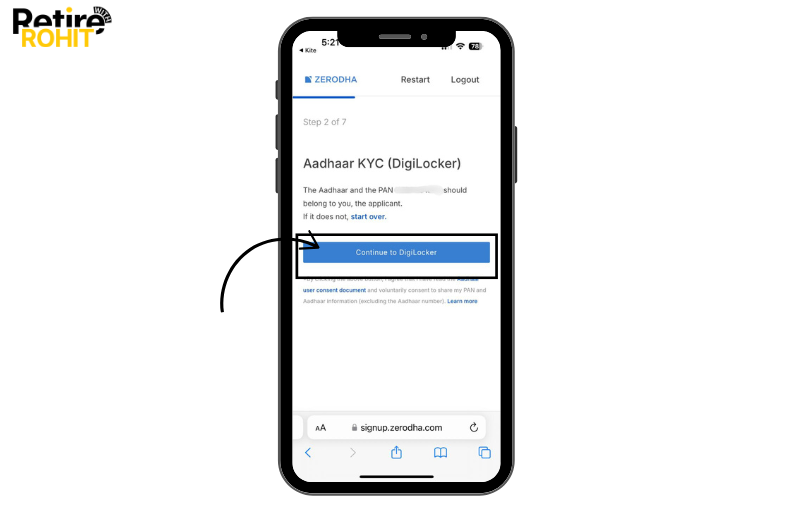
9. Then click on the continue to digiLocker.
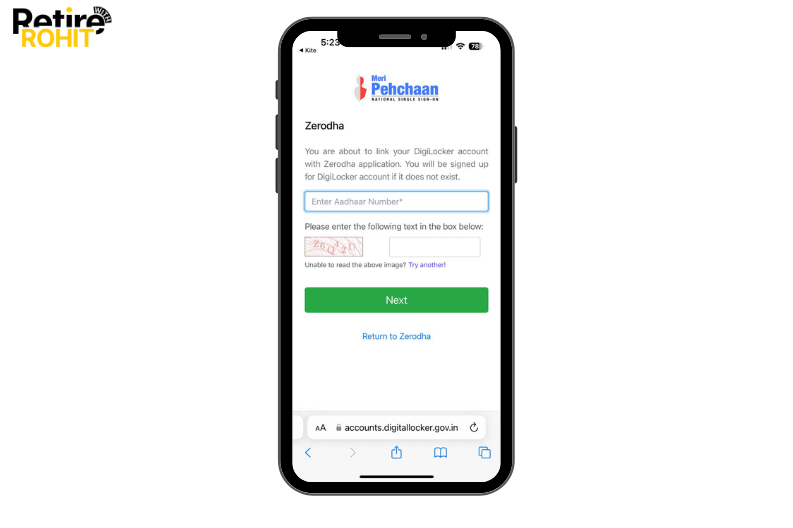
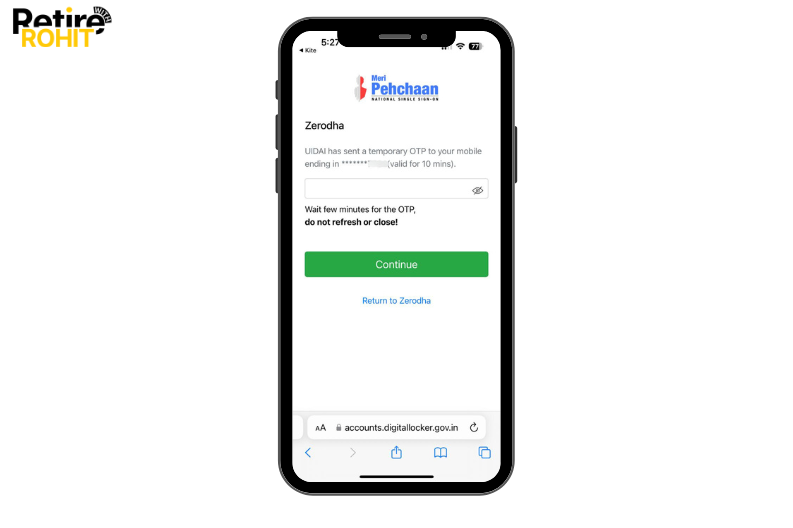
10. Enter your Aadhaar Number, enter the captcha, and then click on the next button.
11. Enter the OTP sent to your registered mobile number.
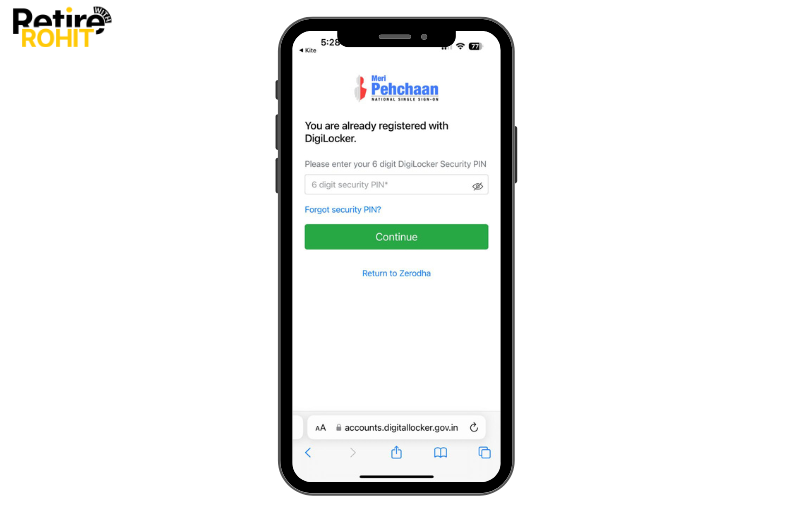
12. Enter your DigiLocker Security PIN, and click on the Continue button.
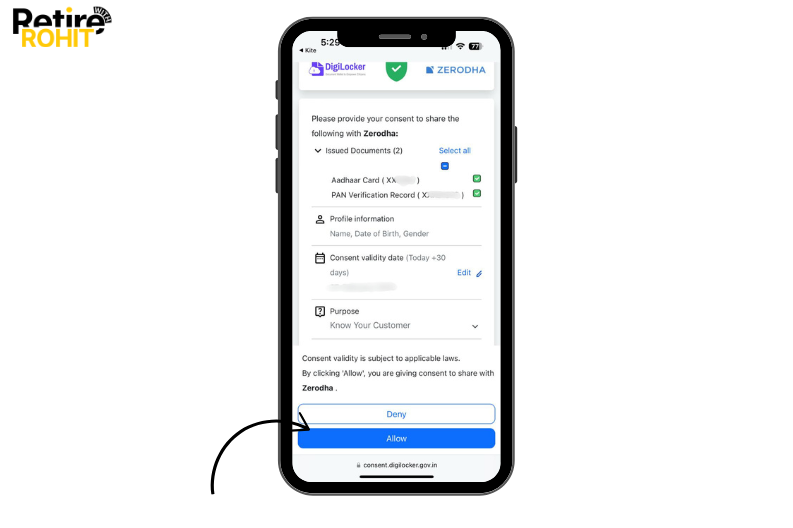
13. Click on the allow button after checking that all the information is correct.
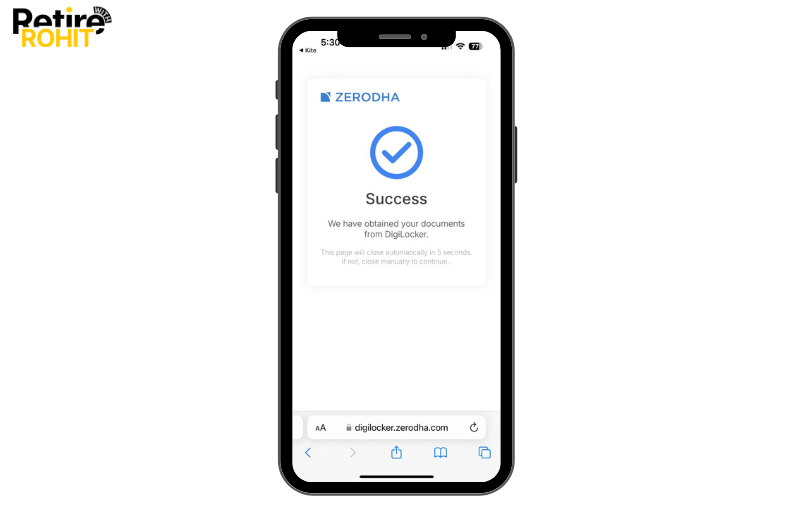
14. Automatically, it will verify all the information.
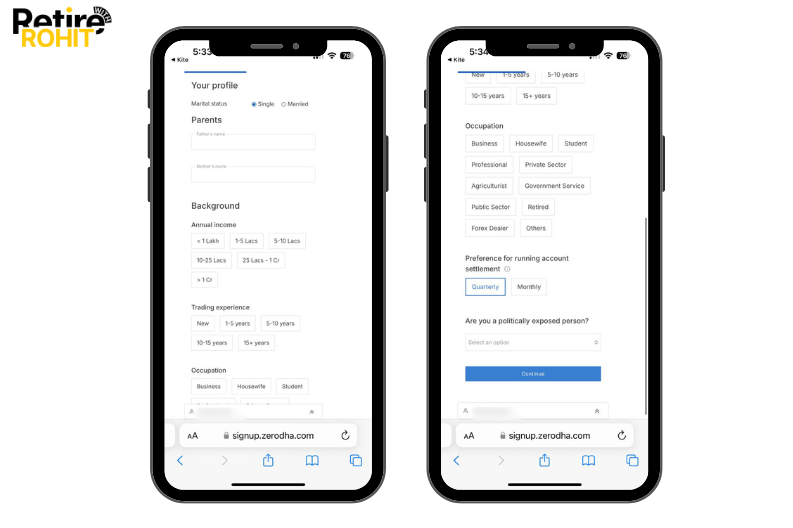
15. Then a new tab will open, “Your Profile”. Enter the details such as Marital status, Parents' names (mother & father), annual income, trading experience, occupation, and many more. and click on the Continue button.
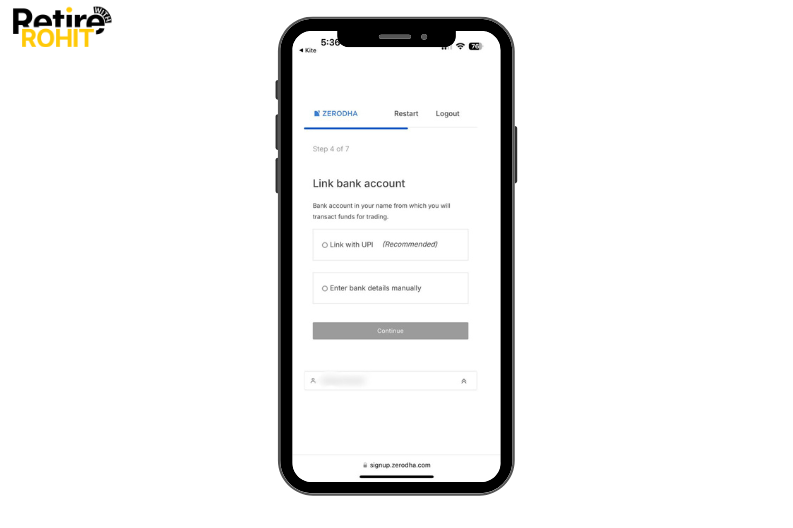
16. Now select the link bank account, Link with UPI, or Enter bank details manually. We choose the link with UPI as it is easy to use, and click on the Continue button.
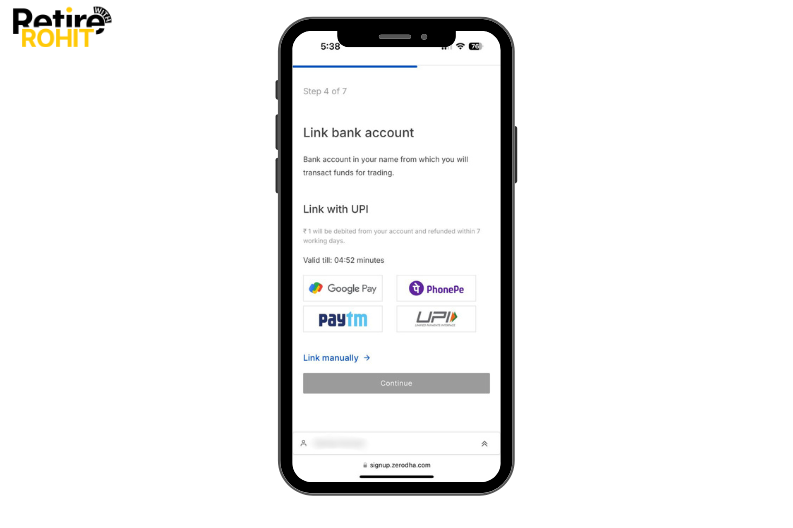
17. Then choose your preferred UPI platform (here you have to pay INR 1 for the confirmation that your UPI platform is working, or the money will be debited from your account in 7 days) and click on the continue button.
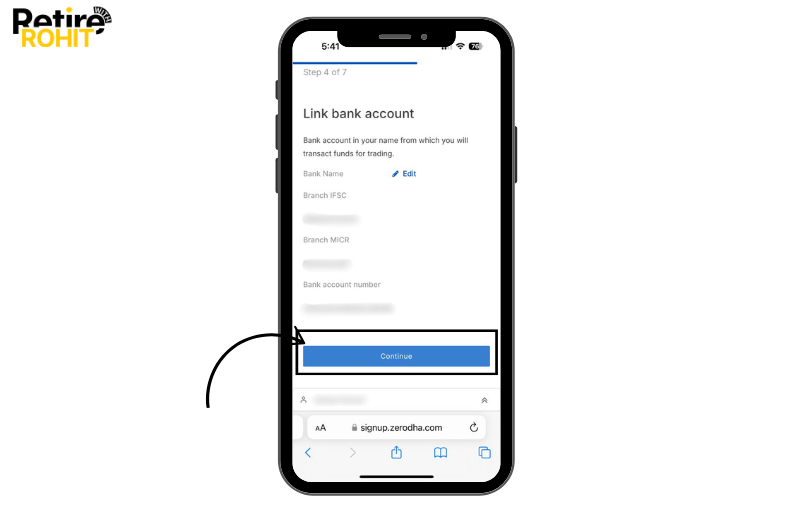
18. Now your bank details will be shown on your display screen. Now click on the Continue button.
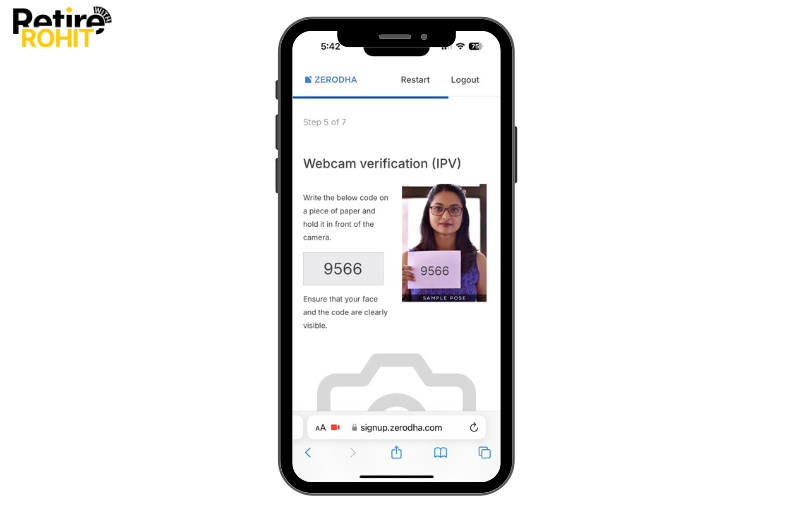
19. Now you have to do a webcam verification where you have to write the code on a piece of paper, hold it in front of the camera, ensure that your face and the code are clearly visible, and click on the capture button.
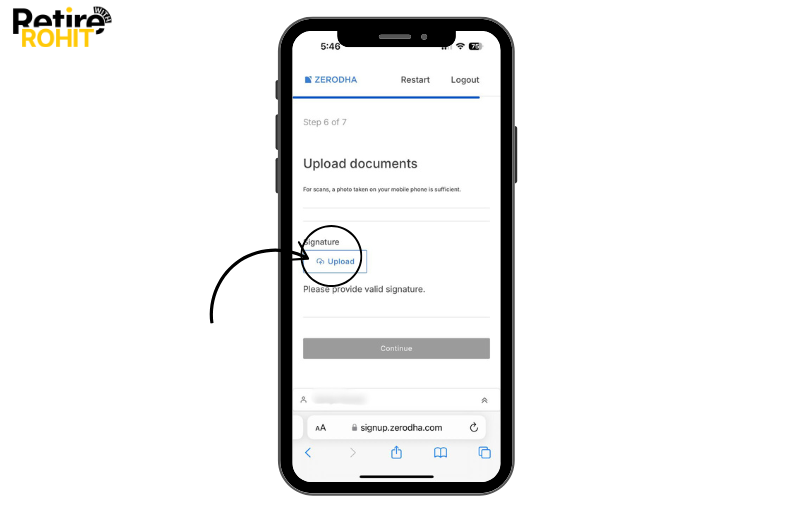
20. Then upload documents where you have to do a e-signature, and then click on the continue button.
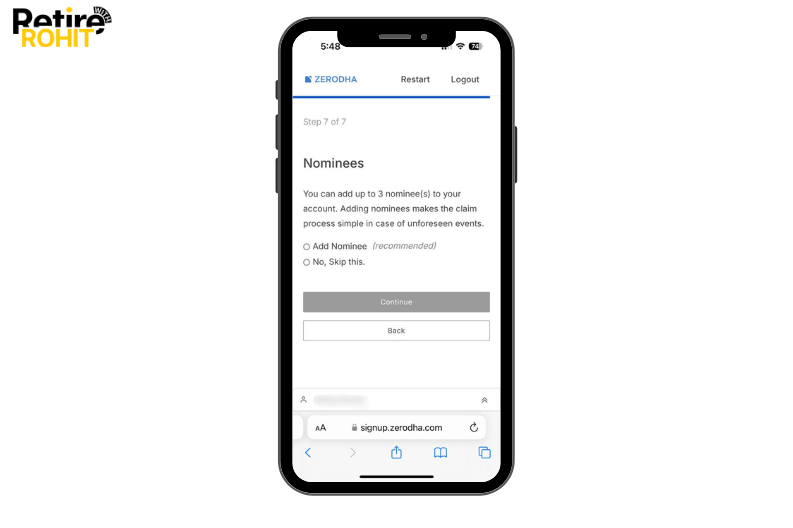
21. If you want to add nominees, then choose Add nominees or if not, then choose No, skip this, and click on the Continue button.
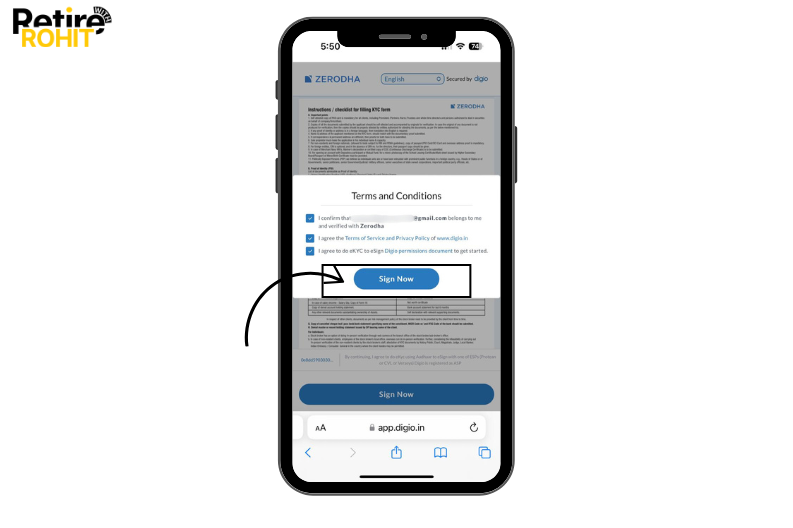
22. Click on the ensign.
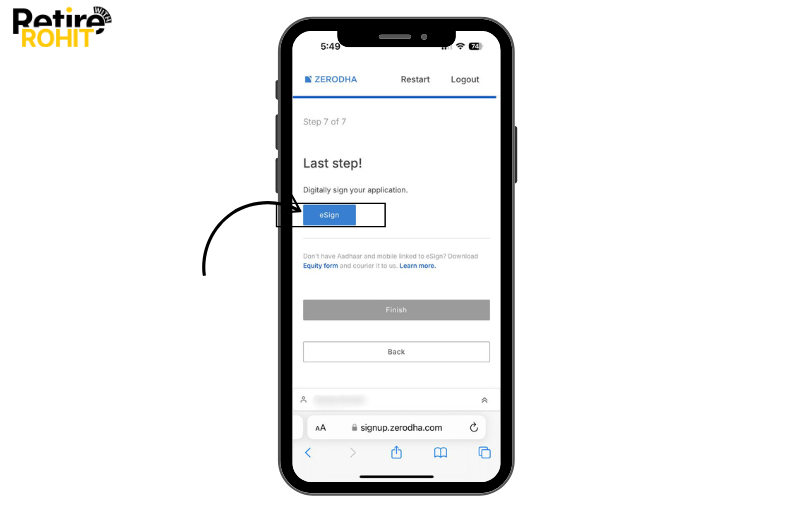
23. Tap on the Sign Now button.
24. Now you have to tick the box Enter the VID/ Aadhaar number, and then click on the send OTP.
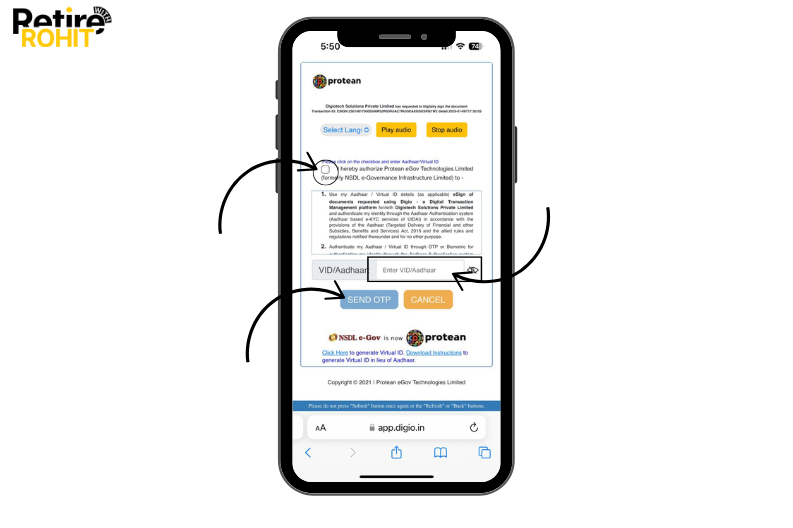
25. Enter the OTP that you will receive on your registered mobile number or email address, and then click on the verify OTP.
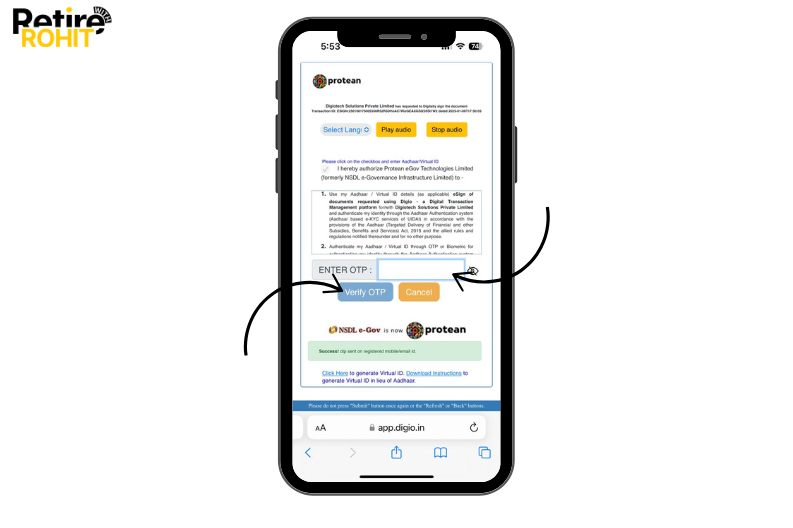
26. Now read that instruction and then click on the sign now button. You may repeat the process of Aadhar card verification.
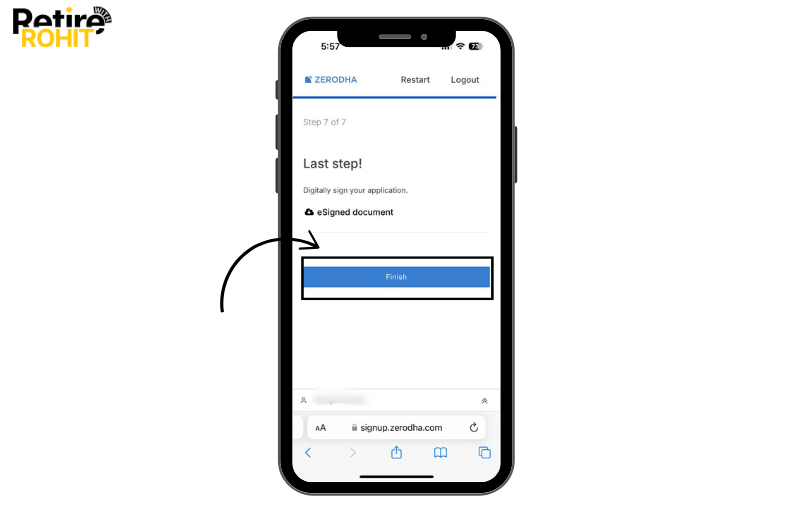
27. If you click on the E-signed document, it will display your KYC form, which you have done, and then click on the finish button.
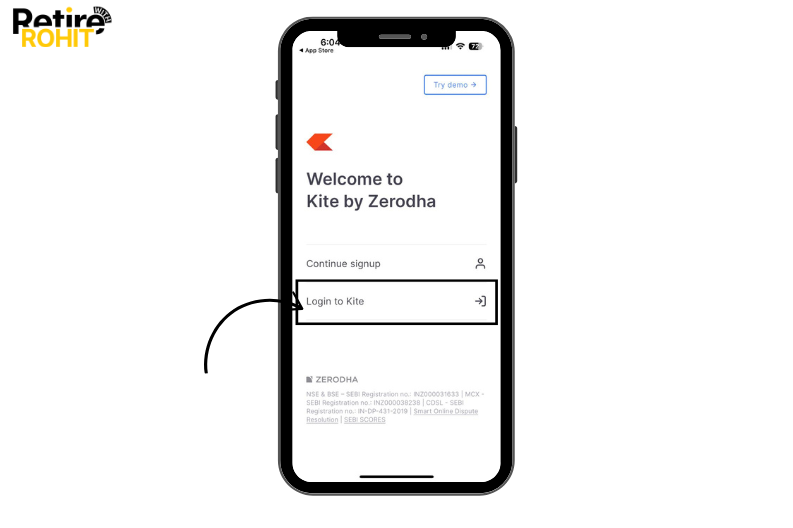
28. Then they will provide you with a Zerodha ID, and then you have to click on the Login to Kite button.

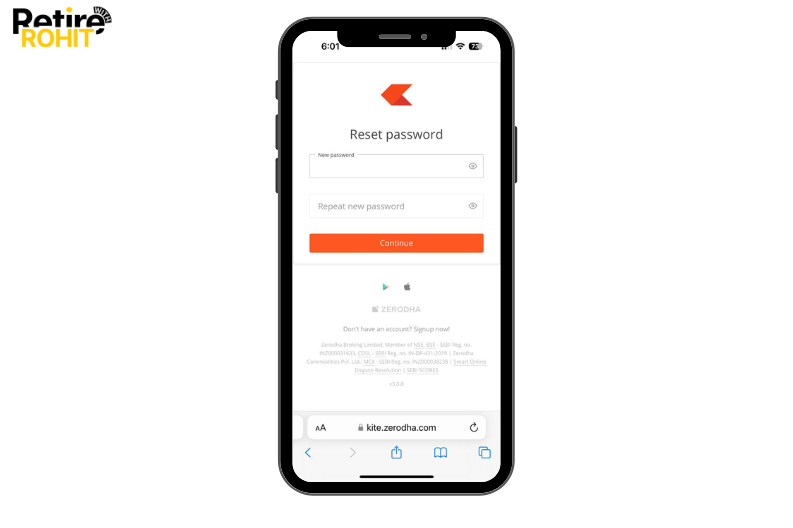
29. Now create your new password, and then repeat the new password, and then click on the continue button.
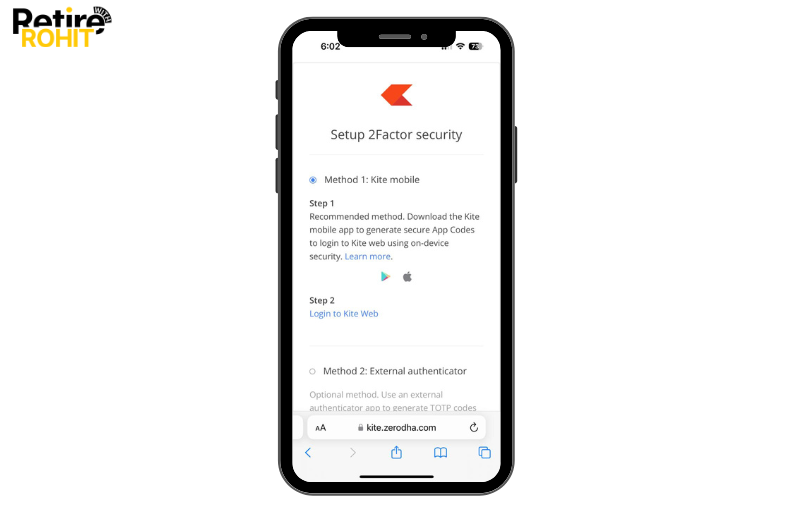
30. Now they will ask for the setup of 2-factor security choices as per your preference.
31. Then click on the Login to Kite.
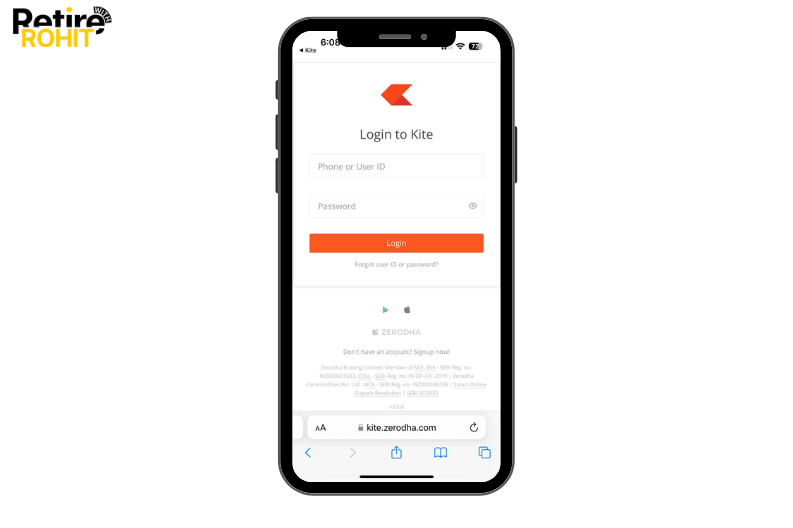
32. Enter the user ID provided by Zerodha. Enter the password that you have created now. Then click on the login button.
33. Now, enter the mobile app code and click on the Continue button.
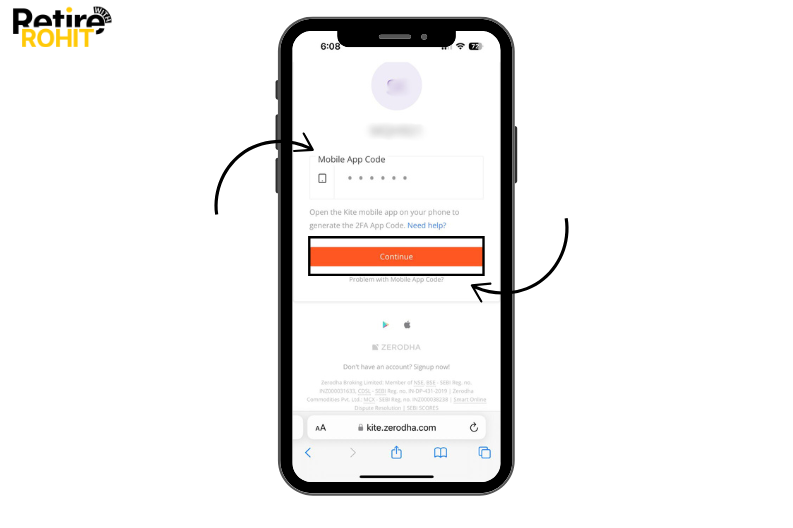
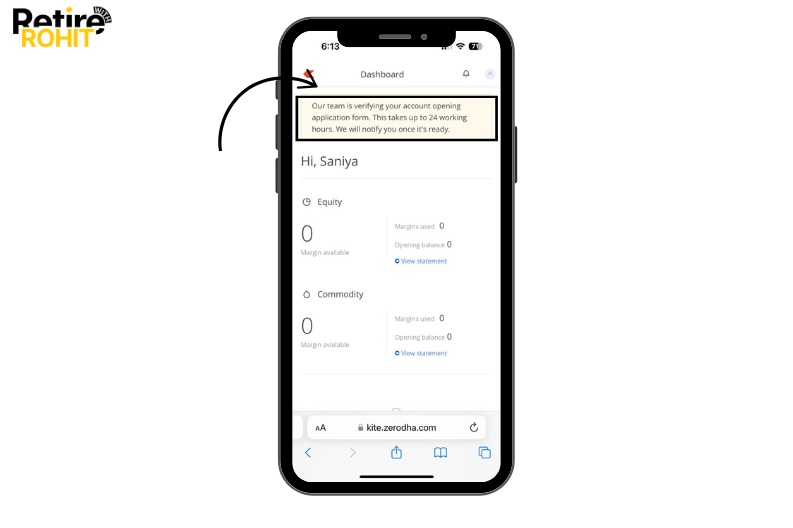
34. Here you go, you are done with the KYC part, now the Zerodha team will verify your account opening application, as this will take up to 24 working hours.
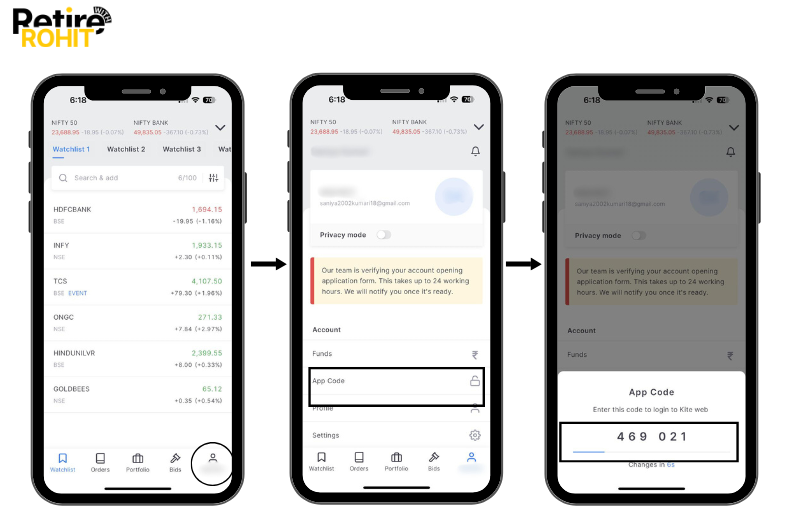
How to generate a Mobile App code?
This app code will ask you at the time of verification for this. You just need to log in with your ID on Zerodha < click on the profile icon < click on the app code < and the code will be displayed on your device screen. The code will be changed every 30 seconds.
How to Update KYC on Zerodha?
If you're already using Zerodha and want to update your KYC details, like a new phone number, email, address, or bank account, here’s how to do it. Steps to update KYC on Zerodha:
- Go to: support.zerodha.com
- In the search bar, type “Update KYC.”
- Click on the relevant article or guide.
- Follow the steps to raise a ticket.
- Upload your new documents (like PAN, Aadhaar, or bank proof).
- Submit the request.
You Can Update:
- Email address
- Residential address
- Bank account details
- Mobile number
- Signature
Zerodha usually updates your KYC details within 2-3 working days.
Common KYC Issues and How to Resolve Them
Here common KYC issues and solutions:
Aadhaar OTP Not Received
- Make sure your Aadhaar is linked to the correct mobile number.
- If not, visit the nearest Aadhaar center to update it.
Document Rejection
- Uploaded files may be blurry, cropped, or unclear.
- Use a good camera, take photos in proper lighting, and upload full-size documents.
Mismatch in PAN and Aadhaar Details
- Your name may be spelled differently on both documents.
- Update either your PAN or Aadhaar so the names match exactly.
Poor Video Quality During IPV (In-Person Verification)
- Happens due to low lighting, shaky video, or weak internet.
- Record the video in a bright room, keep the camera steady, and use a stable internet connection.
Also Check - How to open a Demat Account in Zerodha.
Conclusion
In conclusion, doing KYC on Zerodha is simple, fast, and completely online. You just need your PAN, Aadhaar, and a phone. Once you’re done, you can start buying stocks like Reliance, Tata Motors, or even invest in IPOs.
Check Other Post Posts
-
 What is TPIN in PNB?
October 11, 2024
-
What is the Difference Between Bank and NBFC?
October 24, 2024
-